T238 V1.9 version for V2 gearbox manual
Share
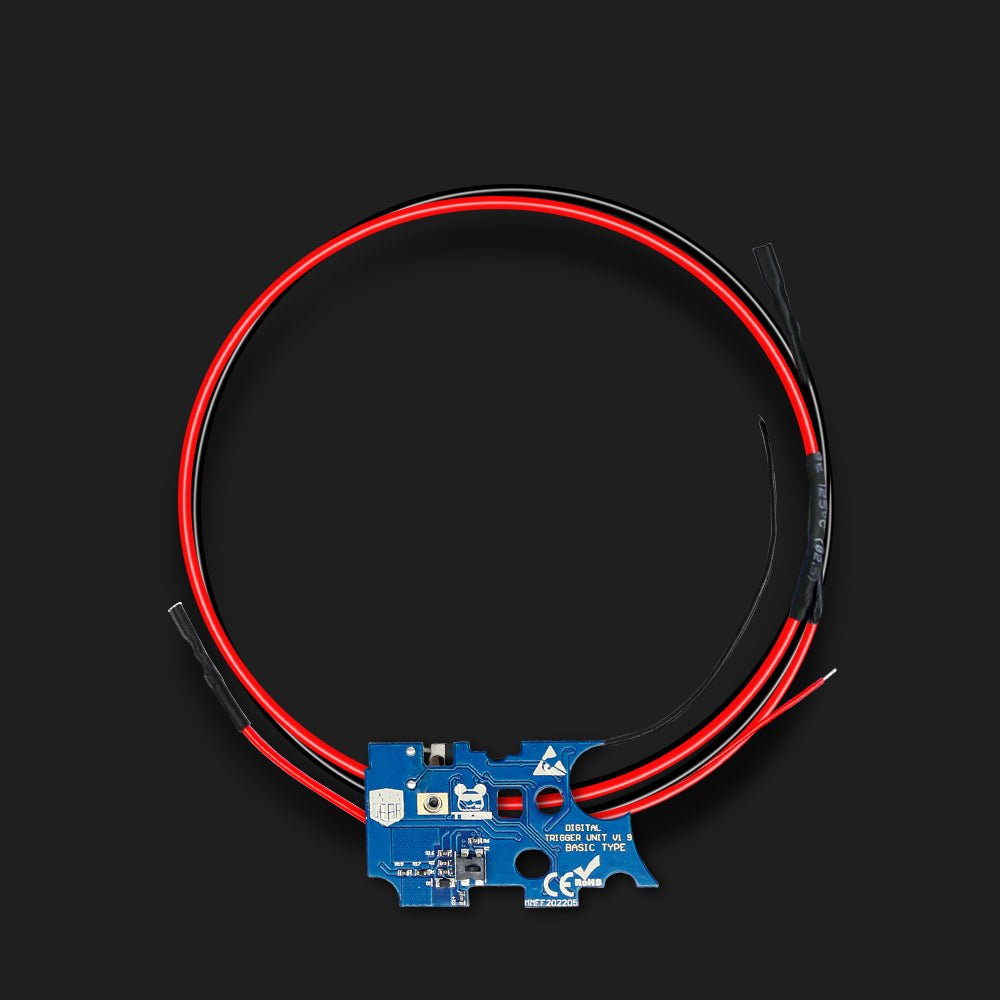
T238 Digital Trigger Unit V2-1.9

Warning:
This upgrade kit is designed for professional AIRSOFT/gel ball blaster player who can fully disassemble and assemble Automatic Electric Gun. The compatibility with all Gearboxes is not guaranteed, but it can fit into standard or common brand Gearboxes V2 without larger modification. Related Tools and skills is needed for installing the product.
Attention:
- Protect the detection switch while installing, do not pull the trigger before finishing installation in case that the trigger breaks the detection switch.
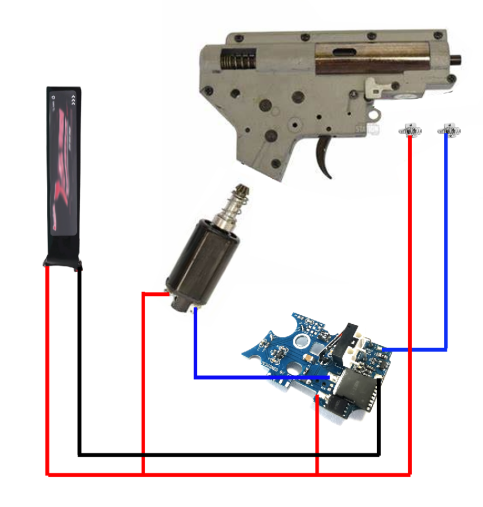
- Mind the positive and negative of the motor, do not reverse.
- Gearbox, motor and grip is not functional before finishing installation. Please finish the installation at first.
- Please use Spring smaller than M150.
- Please keep your gearbox clean, and keep the LEDs D5, D6 clean.
Description:
T238 digital trigger unit is a programmable MOSFET which is specially designed for AIRSOFT and gel ball version Gearbox V2. With high speed processor and 2 high power MOSFET chips, this system has many functions, such as binary trigger, auto-loading function for gel ball magazine, over heat protection and so on. Besides, it also has the functions of gearbox block-up protection. It can effectively improve the stability, shooting speed and response speed of gearbox. The module uses a maximum of 11.1V batteries. Soldering and wiring are required.
Main parameters:
- Size: 45*30*14mm
- Operating voltage: 7.4-11.1V
- Active break tech
- Uses optical sensor for gear detection
- Binary triggershooting mode
- Overheat protection
- Maximum Inrush current is 300A, Maximum Brake current is 100A
- Compatible with various Standard Gearbox V2
Functions:
- Binary trigger. Put the selector in semi-auto position, pull and hold the trigger for 3 seconds will change the semi-auto function into binary trigger shooting mode.
- Block-up protection. When gearboxBlock-up occurs, the system stops working and emits an elongated ‘beep’ Please check the wave box immediately by power off.
- Auto-loading function is designed for gel ball blaster magazines with motor inside, when changing the magazine, the magazine motor will run automatically for 0.5 second.
- This module is able to increase rate of fire, the stability of single-shot and make batteries have higher durability.
- The energy that support the active brake function comes from the inertia of motor, stop the piston without delay. The effect of active brake is significant on high torque motor
- The active function prevents the over-spin of gears, this solve the issue that the single shot becomes multiple shot under high voltage. Meanwhile, the spring is fully released in semi-auto modeand parts in gearbox are not under strain, increase the life cycle of gearbox and parts.
- When the DTU is overheated, after the trigger is pulled, the motor will give a beep prompt until it is automatically restarted after cooling.
Modes:
SAFE:This mode is completely the same as original safe mode. The trigger is stopped by Safety lever
SEMI: This mode can be programmed to binary trigger shooting mode , the default mode is semi auto
AUTO: This mode is Full-auto
Requirements:
- Silver plate wire is needed for this system, power wire for motor and battery should be larger than 0.5sqm silver plate wire, wire for electronic powered magazine should be around 0.25sqm.
- High-power soldering iron (higher than 50W) is recommended, solder the clop with 0.5sqm soldering wire and soldering rosin. Please ask professional for help if you do not know to solder.
- Please use Spring smaller than M150.
- Use high torque motor can stop the motor fasterand prevent DTU from overheating .
- In standby state, the current of the system is smaller than 0.01A. Please disconnect the battery if it is not used for a long time.

Installation:
- Measure the length of each wire according to the wiring diagram then solder the wires on the clip (The exposed solder joint on the PCB clip is not stand too much force, do not pull the wire after the wire is soldered in case damaging the clip)
- Disassemble the gearbox, it is necessary to take off the cut-off lever, keep the Safety lever and selector plate on the gearbox (Tutorial for disassemble gearbox can be found on YouTube)
- Install the module and push the wires in the gearbox (some gearbox needs to be cut off stiffener or drilled hole)
- Assemble the gearbox
- For more details, visit http://t238.net
Quick Test:
After soldering, connect the motor. Make sure the wires are connected correctly, then press and the trigger switch and connect the battery. After you hear a long ‘beep’ with 3 short ‘beep’s, release the trigger switch , the the module will run into Quick Test mode. Press each switch one by one, you will get two ‘beep’s. If not, your module is not right, contact the customer service immediately.
When testing gear sensor Use opaque objects to block between d5 and D6 LEDs.
Programming:
- Connect the battery and pulland hold the trigger for 3 seconds, After hearing 2 long ‘beep~’ , the semi-auto function turns into binary trigger shooting mode.
Trouble shooting:


- The green circle indicates the detection position of DTU gear sensors, and the red circle indicates the rotation axis position of sector gear. When DTU matches the position of gearbox, the centers of the two circles will coincide.
- If the red circle is not concentric with the green circle, it indicates that the size of DTU and gearbox does not match, and the sector gear needs to be modified.
- When the green circle is to the left of the red circle, the green position of sector gear needs to be extended by 1mm; When the green circle is to the right of the red circle, the red position of sector gear needs to be removed by 1mm.


